
Instagram Clone ? 🙂😎
Building a clone of the Instagram homepage using HTML, CSS and JavaScript is a great way to learn the basics of front-end web development. In this tutorial, we will walk you through the steps of creating a clone of the Instagram homepage.
Step 1: Set up the HTML
The first step is to create the HTML for the page. We will use basic HTML tags and a CSS framework to create a simple page structure.
First, create a file called index.html and open it in your text editor of choice. Create a basic HTML5 document structure and add the following code:
<!DOCTYPE html>
<html>
    <head>
        <title>Instagram Clone</title>
    </head>
    <body>
        <!-- Content here -->
Instagram
    </body>
</html>
Output:

This code creates a basic HTML5 document structure. Next, we will add the HTML elements for the page. We will include the following elements:
- Header – This will contain the logo and navigation links.
- Hero Section – This will contain an image and text about the page.
- Footer – This will contain copyright information and other links.
Add the following code to the tag:
<header>
    <h1>Instagram Clone</h1>
    <nav>
        <ul>
            <li><a href="#">Home</a></li>
            <li><a href="#">Explore</a></li>
            <li><a href="#">Profile</a></li>
        </ul>
    </nav>
</header>
<main>
    <section class="hero">
        <img src="images/hero.jpg" alt="Hero Image">
        <h2>Welcome to Instagram Clone!</h2>
    </section>
</main>
<footer>
    <p>Copyright 2020 - Instagram Clone</p>
</footer>Output:
This code adds the basic HTML elements for the page.
Step 2: Add the CSS
Now that we have the HTML for the page, we will add the CSS to style the page.
First, create a new file called style.css and link it to the HTML file. Add the following code to the tag:
Next, add the following code to the style.css file to style the page:
body {
margin: 0;
padding: 0;
font-family: sans-serif;
}
header {
padding: 20px;
background-color: #fafafa;
text-align: center;
}
nav ul {
margin: 0;
padding: 0;
list-style: none;
}
nav li {
display: inline-block;
margin-left: 10px;
}
.hero {
background-image: url("images/hero.jpg");
background-size: cover;
height: 400px;
text-align: center;
padding: 20px;
}
.hero h2 {
color: white;
font-family: sans-serif;
}
footer {
padding: 20px;
background-color: #fafafa;
text-align: center;
font-size: 12px;
}
Building a Flask Login Web App: A Comprehensive Guide | Tech nileshBlog
This code styles the page.
Step 3: Add the JavaScript
Now that we have the HTML and CSS for the page, we can add the JavaScript to make the page interactive.
First, create a new file called script.js and link it to the HTML file. Add the following code to the tag:
Next, add the following code to the script.js file to add the JavaScript:
// Your JavaScript code here
This code adds the JavaScript for the page.
Full Html Css Code for Instagram Clone:
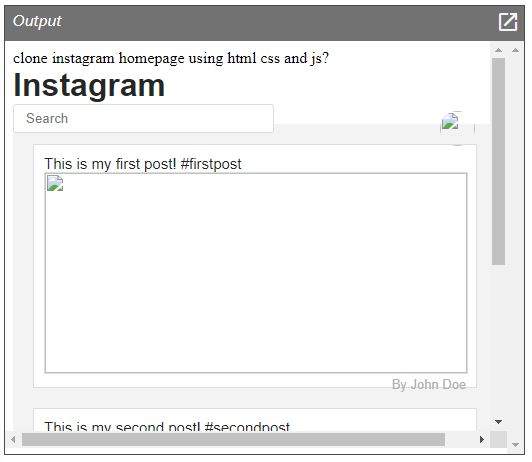
clone instagram homepage using html css and js?

<!DOCTYPE html>
<html>

<head>
    <title>Instagram Homepage</title>
    <style type="text/css">
        /* Styling for the Instagram logo */
        .insta-logo {
            font-family: 'Helvetica Neue', sans-serif;
            font-weight: bold;
            color: #262626;
            font-size: 32px;
        }
        /* Styling for the search bar */
        .search-bar {
            width: 50%;
            border: 1px solid #ddd;
            border-radius: 3px;
            padding: 6px 12px;
            float: left;
        }
        /* Styling for the profile avatar */
        .profile-avatar {
            float: right;
            width: 35px;
            height: 35px;
            border-radius: 50%;
            margin-top: 7px;
            margin-right: 7px;
        }
        /* Styling for the newsfeed container */
        .newsfeed-container {
            width: 100%;
            margin-top: 20px;
            margin-bottom: 20px;
            margin-left: auto;
            margin-right: auto;
            padding: 20px;
            background-color: #f3f3f3;
        }
        /* Styling for the posts */
        .post {
            width: 90%;
            margin-bottom: 20px;
            padding: 10px;
            border: 1px solid #ddd;
            background-color: #fff;
        }
        /* Styling for the post text */
        .post-text {
            font-family: 'Helvetica Neue', sans-serif;
            font-size: 15px;
            color: #262626;
        }
        /* Styling for the post image */
        .post-image {
            width: 100%;
            height: 200px;
            border: 1px solid #ddd;
        }
        /* Styling for the post author */
        .post-author {
            font-family: 'Helvetica Neue', sans-serif;
            font-size: 13px;
            color: #afafaf;
            float: right;
        }
    </style>
    <script type="text/javascript">
        // Function to search for posts
        function searchPosts() {
            // Get the value of the search bar
            var searchValue = document.getElementById('searchBar').value;

            // Get all posts
            var posts = document.getElementsByClassName('post');

            // Loop through each post
            for (var i = 0; i < posts.length; i++) {
                var postText = posts[i].getElementsByClassName('post-text')[0].innerHTML.toLowerCase();

                // If the post text contains the search value, display the post
                if (postText.indexOf(searchValue.toLowerCase()) >= 0) {
                    posts[i].style.display = 'block';
                }
                // Otherwise, hide the post
                else {
                    posts[i].style.display = 'none';
                }
            }
        }
    </script>
</head>

<body>
    <div>
        <!-- Header -->
        <div>
            <!-- Logo -->
            <div class="insta-logo">Instagram</div>
            <!-- Search bar -->
            <input type="text" class="search-bar" id="searchBar" onkeyup="searchPosts()" placeholder="Search">
            <!-- Profile avatar -->
            <img class="profile-avatar" src="profile_avatar.jpg">
        </div>

        <!-- Newsfeed -->
        <div class="newsfeed-container">
            <!-- Post 1 -->
            <div class="post">
                <!-- Post text -->
                <div class="post-text">This is my first post! #firstpost</div>
                <!-- Post image -->
                <img class="post-image" src="post_image.jpg">
                <!-- Post author -->
                <div class="post-author">By John Doe</div>
            </div>

            <!-- Post 2 -->
            <div class="post">
                <!-- Post text -->
                <div class="post-text">This is my second post! #secondpost</div>
                <!-- Post image -->
                <img class="post-image" src="post_image2.jpg">
                <!-- Post author -->
                <div class="post-author">By Jane Doe</div>
            </div>
        </div>
    </div>
</body>

</html>
Output:

Conclusion
In this tutorial, we have walked you through the steps of creating a clone of the Instagram homepage using HTML, CSS and JavaScript. We have also shown you how to add the JavaScript for the page. With a little practice, you should be able to build other webpages using the same techniques.
